coastguard rescue
Special feature

DIY life-jacket servicing

Without spending a lot of money, and with a little bit of time and patience, you can easily restore your life-jacket, as Dave White explains…

Most pilots who own life-jackets are likely to send them off for professional servicing at regular intervals. Given that they are safety equipment, this is perfectly understandable and isn’t particularly expensive, although (within limits) it is quite possible to service them yourself for around £20 including parts – plus an hour or so of your own time.

If you do decide to go DIY, the first thing to do is to identify the particular jacket you have.

Mine is a common type, branded as HM Survivor (obtained from the excellent Harry Mendelssohn pilot supplies company near Edinburgh), although a label revealed them to actually be manufactured by Baltic in Sweden…

Before you begin any DIY, make sure you know which brand your life-jacket is… the one shown is HM Survivor

You’ll need to know the original manufacturer to identify and order a replacement gas canister.  The inflation kit part number you want is likely to be printed on the jacket itself or, if not, will probably be available by searching the original manufacturer’s website.

Use the lifejacket model number, which will be on a label somewhere.

The Harry Mendelsohhn/Baltic jackets did have the canister part number printed on the orange life-jacket stole, but when I searched for #2505, nothing could be found.

A further search on the Baltic website revealed that kit #2505 had been superseded by kit #2433. It may take a little internet sleuthing for older jackets, but persevere in case model numbers have been updated.

Once you have the replacement cylinder kit part number, most canisters are readily available online, and yacht chandlers are typically the most cost-effective source of new cylinders at around £20 each delivered.

Once you have the cylinder(s) you’re ready to begin.

life-jacket
Ensure you have the correct cylinder kit part number, as they may well have changed in older life-jackets

First, carefully open the lifejacket. The protective outer cover is almost certainly velcroed on. Memorise (i.e. take a picture!) how it is folded inside when deflated.

The creases later will give a strong clue but best to look now. You may have already reached this stage when you were searching for part numbers earlier. 

Then Velcro back up again and prepare to inflate. Do NOT do this by mouth – you’ll introduce moisture into the inflation chambers, which is undesirable as it can make the material stick together and create a breeding ground for mould.

Instead, wear the jacket as you normally would then inflate with the emergency toggle. There are two reasons for this.

First, it gets the action into muscle memory and also may help your own startle response if you use it in anger – you’ll know what to expect.

Second, you’ll fully inflate the jacket rapidly with realistic loading and will exercise the inflating mechanism fully.

Once inflated, take off the jacket (which may be easier said than done when it’s sticking out in front of you) and leave it for at least 12 hours. 

When you come back to it, expect some minor deflation, but if the inflation chamber is generally taut you can be sure it’ll keep you afloat long enough for Search & Rescue to come and get you.

life-jackets
Two jackets left inflated overnight with cylinder kits ready for replacement

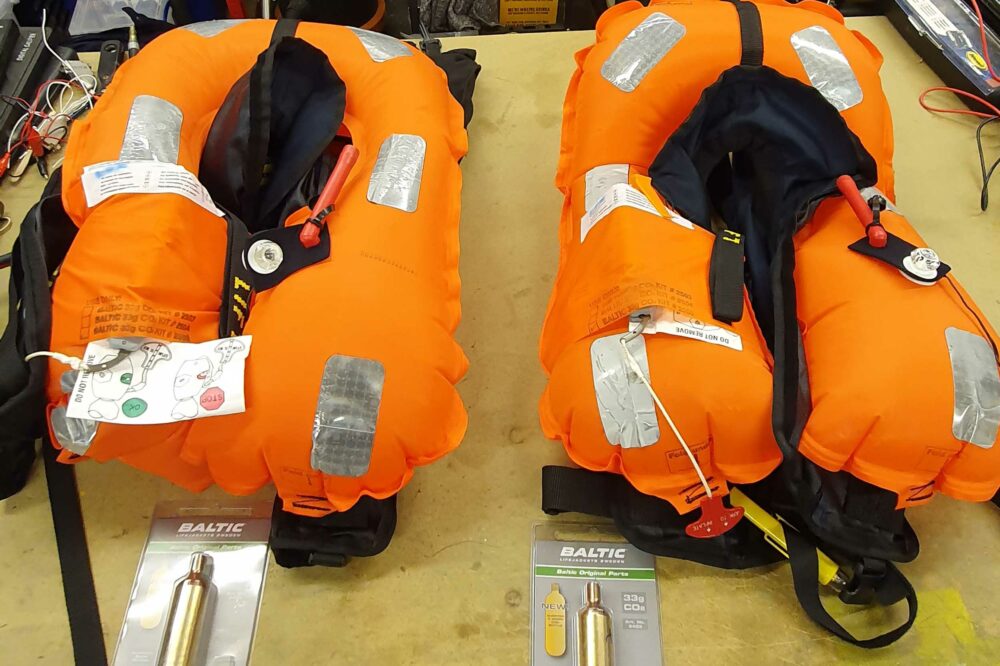
While still inflated, give the jacket a good once-over.  Check all the seams and attachments as well as the condition of the material, straps and buckles.

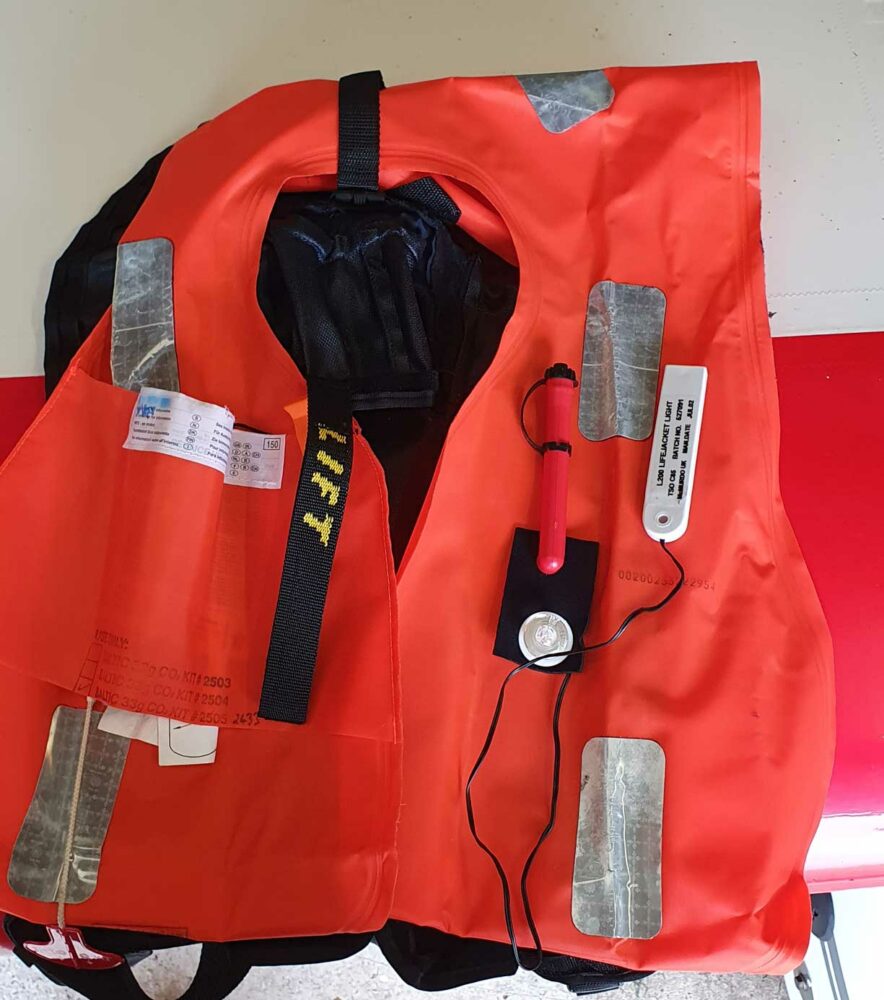
As with the Baltic jackets there may well be a loop strap inside the jacket marked ‘LIFT’ or similar. This wants special care as it could be where a SAR helicopter winch operator lifts you out of the water so you want to be confident the stitching is robust!

Confirm that there are no puncture hazards within the cover or on the inflated stole itself.

Check the condition of any ancillaries such as spray hood, reflective patches, whistle and light (including its seawater battery and connections).

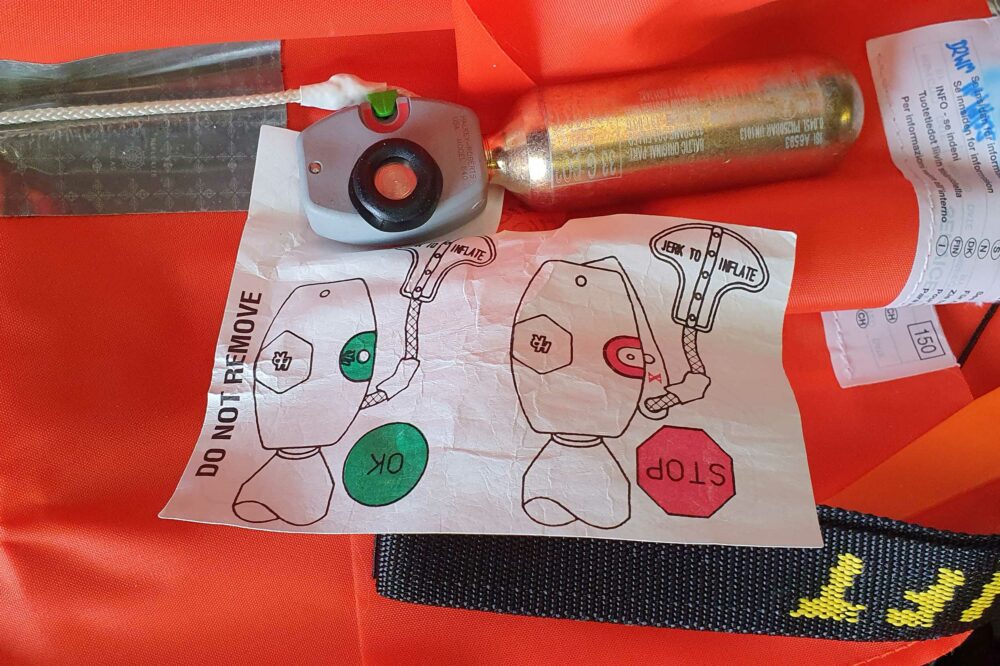
Don’t forget to check for corrosion on the cylinder seating and actuation lever. 

Any damage found, other than trivial or obviously repairable to a high standard, means it’s probably time to condemn the jacket.

If the jacket passes inspection, deflate it using a blunt device pressed carefully into the oral inflation valve.

Get as much gas out as you can. Aim for zero residual buoyancy – that is, empty!

At this point give the deflated jacket another inspection to ensure nothing was missed when it was bulging with gas.

life-jacket
Deflated jacket opened for inspection – note ‘LIFT’ becket strap

Now carefully replace the expired cylinder with your new one.

Don’t forget to mount the plastic activation tell-tale usually supplied with the kit. This is provided to show if the lever moves out of position in the future. 

Ensure that the toggle activation lever has been set to the correct position before installing the new cylinder. There are several designs depending on manufacturer, but it is usually difficult or impossible to screw in the cylinder with the lever out of position.

You may also find, as with Baltic jackets, that there is an instruction tag inside the jacket.

life-jacket
Uninflated jacket showing cylinder lever position indicator tag

There is probably a service record tag on the jacket somewhere – likely in the cover lining – so make a note of the date of service using an indelible pen.

Bear in mind that that’ll come in handy in a year or so when you’ve forgotten when you did it…

Take note of the next recommended service period – one year, three years?

If nothing particular is specified, you may wish to define your own. Annually may be too much, given inflation strain – I usually choose three years, but it’s up to you.

At this point you can carefully re-fold the empty inflatable stole (using info gained before inflation – you haven’t lost that photo, have you?) and pack everything carefully into the protective cover before velcroing together.

And that’s it. Sorted.

Share

Leave a Reply

Share
Topics
  • 2
  • 3
Enjoy 3 Free articles OR Join today to enjoy unlimited access to all content
Join today

We use cookies to give you the best online experience. Please let us know if you agree to all of these cookies.